Draft:Farm (Forestry): Difference between revisions
No edit summary |
No edit summary |
||
| (4 intermediate revisions by the same user not shown) | |||
| Line 1: | Line 1: | ||
[[Category:Mod:Forestry]] | [[Category:Mod:Forestry]] | ||
[[Category:Multiblock]] | |||
[[Category:RF Consumption]] | |||
The farm is an automated way of farming various crops. | The farm is an automated way of farming various crops. | ||
=== Size === | === Size === | ||
The Farm's central structure can be built in 6 different sizes. While larger farms cost more to build, they will provide resources at a higher rate | The Farm's central structure can be built in 6 different sizes. While larger farms cost more to build, they will provide resources at a higher rate due to the increased crop plot area. | ||
These diagrams and figures show the maximum configurable area, the farm can operate within a smaller area as well. | These diagrams and figures show the maximum configurable area, the farm can operate within a smaller area as well. The farmable area is defined by where [[#Crop_Plot_Base|crop plot base]] blocks are placed. | ||
The | |||
{| class="wikitable" | {| class="wikitable" | ||
|- | |- | ||
! scope="col" | | ! scope="col" | Layout Diagram | ||
! scope="col" | Center Size | |||
! scope="col" | Max Extents | |||
! scope="col" | Farmable Area | |||
! scope="col" | Farm Block Count | ! scope="col" | Farm Block Count | ||
! scope="col" | Total Farm Block Ingredients | ! scope="col" | Total Farm Block Ingredients | ||
|- | |- | ||
| [[File:Farm_Multiblock_Layout_3x3.png|frameless|upright=0.63|center]] | |||
| 3 x 3 (x 4) | | 3 x 3 (x 4) | ||
| 17 x 17 | |||
| {{Stack|168|nox=true}} | |||
| 36 | | 36 | ||
| {{ | | {{Item|oredict:ingotCopper|icon}} {{Stack|72}} | ||
{{ | {{Item|oredict:slabWood|icon}} {{Stack|72}} (any wood type) | ||
{{ | {{Item|Forestry:thermionicTubes#1|icon}} {{Stack|36}} | ||
{{ItemIcon|icon=minecraft:stonebrick#0|size=32}} {{Stack|36}} (see [[#Central_Mechanism|Central Mechanism]]) | {{ItemIcon|icon=minecraft:stonebrick#0|size=32}} {{Stack|36}} (see [[#Central_Mechanism|Central Mechanism]]) | ||
|- | |- | ||
| 3 | | [[File:Farm_Multiblock_Layout_4x3.png|frameless|upright=0.815|center]] | ||
| 4 x 3 (x 4) | |||
| 21 x 22 | |||
| {{Stack|270|nox=true}} | |||
| 48 | | 48 | ||
| {{ | | {{Item|oredict:ingotCopper|icon}} {{Stack|96}} | ||
{{ | {{Item|oredict:slabWood|icon}} {{Stack|96}} (any wood type) | ||
{{ | {{Item|Forestry:thermionicTubes#1|icon}} {{Stack|48}} | ||
{{ItemIcon|icon=minecraft:stonebrick#0|size=32}} {{Stack|48}} (see [[#Central_Mechanism|Central Mechanism]]) | {{ItemIcon|icon=minecraft:stonebrick#0|size=32}} {{Stack|48}} (see [[#Central_Mechanism|Central Mechanism]]) | ||
|- | |- | ||
| [[File:Farm_Multiblock_Layout_4x4.png|frameless|upright=0.815|center]] | |||
| 4 x 4 (x 4) | | 4 x 4 (x 4) | ||
| 22 x 22 | |||
| {{Stack|288|nox=true}} | |||
| 64 | | 64 | ||
| {{ | | {{Item|oredict:ingotCopper|icon}} {{Stack|128}} | ||
{{ | {{Item|oredict:slabWood|icon}} {{Stack|128}} (any wood type) | ||
{{ | {{Item|Forestry:thermionicTubes#1|icon}} {{Stack|64}} | ||
{{ItemIcon|icon=minecraft:stonebrick#0|size=32}} {{Stack|64}} (see [[#Central_Mechanism|Central Mechanism]]) | {{ItemIcon|icon=minecraft:stonebrick#0|size=32}} {{Stack|64}} (see [[#Central_Mechanism|Central Mechanism]]) | ||
|- | |- | ||
| 3 | | [[File:Farm_Multiblock_Layout_5x3.png|frameless]] | ||
| 5 x 3 (x 4) | |||
| 25 x 27 | |||
| {{Stack|396|nox=true}} | |||
| 60 | | 60 | ||
| {{ | | {{Item|oredict:ingotCopper|icon}} {{Stack|120}} | ||
{{ | {{Item|oredict:slabWood|icon}} {{Stack|120}} (any wood type) | ||
{{ | {{Item|Forestry:thermionicTubes#1|icon}} {{Stack|60}} | ||
{{ItemIcon|icon=minecraft:stonebrick#0|size=32}} {{Stack|60}} (see [[#Central_Mechanism|Central Mechanism]]) | {{ItemIcon|icon=minecraft:stonebrick#0|size=32}} {{Stack|60}} (see [[#Central_Mechanism|Central Mechanism]]) | ||
|- | |- | ||
| 4 | | [[File:Farm_Multiblock_Layout_5x4.png|frameless]] | ||
| 5 x 4 (x 4) | |||
| 26 x 27 | |||
| {{Stack|418|nox=true}} | |||
| {{Stack|80|nox=true}} | | {{Stack|80|nox=true}} | ||
| {{ | | {{Item|oredict:ingotCopper|icon}} {{Stack|160}} | ||
{{ | {{Item|oredict:slabWood|icon}} {{Stack|160}} (any wood type) | ||
{{ | {{Item|Forestry:thermionicTubes#1|icon}} {{Stack|80}} | ||
{{ItemIcon|icon=minecraft:stonebrick#0|size=32}} {{Stack|80}} (see [[#Central_Mechanism|Central Mechanism]]) | {{ItemIcon|icon=minecraft:stonebrick#0|size=32}} {{Stack|80}} (see [[#Central_Mechanism|Central Mechanism]]) | ||
|- | |- | ||
| [[File:Farm_Multiblock_Layout_5x5.png|frameless]] | |||
| 5 x 5 (x 4) | | 5 x 5 (x 4) | ||
| 27 x 27 | |||
| {{Stack|440|nox=true}} | |||
| {{Stack|100|nox=true}} | | {{Stack|100|nox=true}} | ||
| {{ | | {{Item|oredict:ingotCopper|icon}} {{Stack|200}} | ||
{{ | {{Item|oredict:slabWood|icon}} {{Stack|200}} (any wood type) | ||
{{ | {{Item|Forestry:thermionicTubes#1|icon}} {{Stack|100}} | ||
{{ItemIcon|icon=minecraft:stonebrick#0|size=32}} {{Stack|100}} (see [[#Central_Mechanism|Central Mechanism]]) | {{ItemIcon|icon=minecraft:stonebrick#0|size=32}} {{Stack|100}} (see [[#Central_Mechanism|Central Mechanism]]) | ||
|} | |} | ||
| Line 96: | Line 103: | ||
{| class="itemtable" | {| class="itemtable" | ||
|- | |- | ||
| {{ | | {{Item|minecraft:sandstone#1|itemtable}} | ||
| {{Item|minecraft:sandstone#2|itemtable}} | |||
| {{ | | {{Item|minecraft:brick_block#0|itemtable}} | ||
| {{Item|minecraft:stonebrick#0|itemtable}} | |||
| {{ | | {{Item|minecraft:stonebrick#1|itemtable}} | ||
| {{Item|minecraft:stonebrick#2|itemtable}} | |||
| {{ | | {{Item|minecraft:stonebrick#3|itemtable}} | ||
| {{Item|minecraft:nether_brick#0|itemtable}} | |||
| {{ | | {{Item|minecraft:quartz_block#0|itemtable}} | ||
| {{Item|minecraft:quartz_block#1|itemtable}} | |||
| {{ | | {{Item|minecraft:quartz_block#2|itemtable}} | ||
| {{ | |||
| {{ | |||
| {{ | |||
| {{ | |||
| {{ | |||
|} | |} | ||
For the central mechanism to be valid, the following criteria must be met: | |||
* Must be 4 blocks tall, regardless of other dimensions | |||
* Must be filled with Farm Blocks (not hollow) | |||
* Must have at least 1 Farm Gearbox integrated into the structure | |||
These aspects are customizable: | |||
* Functional blocks (listed below) may be placed anywhere within the structure that is accessible from the outside, except in the second layer from the top (indicated by a thick gray band when fully assembled) | |||
* Farm Blocks may be built from any mix of the above-listed materials | |||
* More than 1 of the same type of functional block may be used (e.g. 2 Farm Hatches, one for input and one for output) | |||
Note: The recipes below all show blocks made from Stone Bricks, however any of the above listed materials may be used. | |||
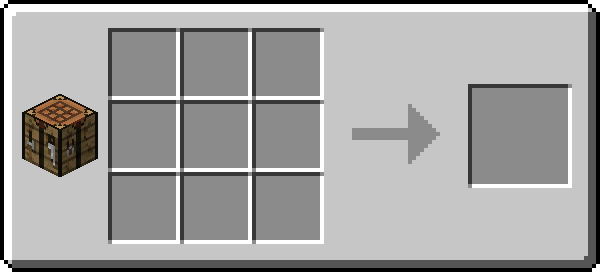
==== Farm Block ==== | |||
The Farm Block is the basic building block of the central mechanism. It cannot be connected to using pipes, the other functional blocks must be integrated into the structure to allow for connections. | |||
{{Recipe|recipe=Forestry:ffarm#0^7E7879FCD4|tool=Shaped3x3}} | |||
==== Farm Gearbox ==== | |||
The Farm Gearbox provides a connection for RF power using any [[:Category:RF Transport|RF transport]] mechanism. Power must be supplied for the farm to operate. | |||
At least 1 Farm Gearbox is required for the structure to be valid. | |||
{{Recipe|recipe=Forestry:ffarm#2^0523C79902|tool=Shaped3x3}} | |||
==== Farm Hatch ==== | |||
The Farm Hatch provides a connection for item input/output using any [[:Category:Item Transport|item transport]] mechanism. | |||
{{Recipe|recipe=Forestry:ffarm#3^FC345043C1|tool=Shaped3x3}} | |||
==== Farm Valve ==== | |||
The Farm Valve provides a connection for water input using any [[:Category:Fluid Transport|fluid transport]] mechanism. | |||
{{Recipe|recipe=Forestry:ffarm#4^E99AE3D002|tool=Shaped3x3}} | |||
==== Farm Control ==== | |||
The Farm Control accepts redstone signals. While an active redstone signal is received, the farm will stop operating. | |||
{{Recipe|recipe=Forestry:ffarm#5^15A4147B18|tool=Shaped3x3}} | |||
=== Crop Plot Base === | === Crop Plot Base === | ||
[[File:Farm Crop Plot Placement.gif|frame|right|Animated side view showing all valid placements of the crop plot base relative to the central mechanism]] | |||
[[File:Valid Farm Example.png|thumb|right|A contrived example of an entirely valid 4x4 farm making full use of available farmable area. The central mechanism and crop plot base both use a mix of materials, the central mechanism contains redundant functional blocks, and the farm is built across multiple elevations]] | |||
To define the area in which the farm operates, a base layer composed of any of the following blocks needs to be manually placed: | |||
{| class="itemtable" | {| class="itemtable" | ||
|- | |- | ||
| {{ | | {{Item|minecraft:sandstone#0|itemtable}} | ||
| {{Item|minecraft:sandstone#1|itemtable}} | |||
| {{ | | {{Item|minecraft:sandstone#2|itemtable}} | ||
| {{Item|minecraft:brick_block#0|itemtable}} | |||
| {{ | | {{Item|minecraft:stonebrick#0|itemtable}} | ||
| {{Item|minecraft:stonebrick#1|itemtable}} | |||
| {{ | | {{Item|minecraft:stonebrick#2|itemtable}} | ||
| {{Item|minecraft:stonebrick#3|itemtable}} | |||
| {{ | | {{Item|minecraft:nether_brick#0|itemtable}} | ||
| {{Item|minecraft:quartz_block#0|itemtable}} | |||
| {{ | | {{Item|minecraft:quartz_block#1|itemtable}} | ||
| {{Item|minecraft:quartz_block#2|itemtable}} | |||
| {{ | |||
| {{ | |||
| {{ | |||
| {{ | |||
| {{ | |||
| {{ | |||
|} | |} | ||
The farm will place farmland on top of the base layer automatically in many configurations (see [[#Configuration|Configuration]] below). The farmable area is divided into 4 sections, as indicated by the coloured regions in the layout diagrams in the [[#Size|Size]] section. Each of the 4 sections is independent, and may be built at a different elevation if desired. The valid elevations are such that the farmland on top of the base layer will be anywhere between 1 block below, to 1 block above the central mechanism's vertical extents. It is not necessary for the crop plot base area to make full use of the maximum possible farmable area, however cutouts in the base area will cause any region behind the cutout to be ignored. | |||
=== Configuration === | === Configuration === | ||
| Line 163: | Line 189: | ||
{| class="wikitable" | {| class="wikitable" | ||
|- | |- | ||
! scope="col" | Item | ! scope="col" | Item | ||
! scope="col" | Configurable Sides | ! scope="col" | Configurable Sides | ||
|- | |- | ||
| {{ | | {{Item|Forestry:chipsets#0}} | ||
| 1 side | | 1 side | ||
|- | |- | ||
| {{ | | {{Item|Forestry:chipsets#1}} | ||
| 2 sides | | 2 sides | ||
|- | |- | ||
| {{ | | {{Item|Forestry:chipsets#2}} | ||
| 3 sides | | 3 sides | ||
|- | |- | ||
| {{ | | {{Item|Forestry:chipsets#3}} | ||
| 4 sides | | 4 sides | ||
|} | |} | ||
| Line 188: | Line 209: | ||
{| class="wikitable" | {| class="wikitable" | ||
|- | |- | ||
! scope="col" | Item | ! scope="col" | Item | ||
! scope="col" | Managed Farm | ! scope="col" | Managed Farm | ||
! scope="col" | Manual Farm | ! scope="col" | Manual Farm | ||
|- | |- | ||
| {{ | | {{Item|Forestry:thermionicTubes#0}} | ||
| Trees | | Trees | ||
| Fruit Trees | | Fruit Trees | ||
|- | |- | ||
| {{ | | {{Item|Forestry:thermionicTubes#1}} | ||
| Peat | | Peat | ||
| Peat | | Peat | ||
|- | |- | ||
| {{ | | {{Item|Forestry:thermionicTubes#2}} | ||
| Crops | | Crops | ||
| Crops | | Crops | ||
|- | |- | ||
| {{ | | {{Item|Forestry:thermionicTubes#3}} | ||
| Vegetables | | Vegetables | ||
| Vegetables | | Vegetables | ||
|- | |- | ||
| {{ | | {{Item|Forestry:thermionicTubes#4}} | ||
| | | | ||
| Cactus | | Cactus | ||
|- | |- | ||
| {{ | | {{Item|Forestry:thermionicTubes#5}} | ||
| | | | ||
| Sugar Cane | | Sugar Cane | ||
|- | |- | ||
| {{ | | {{Item|Forestry:thermionicTubes#6}} | ||
| | | | ||
| Gourd | | Gourd | ||
|- | |- | ||
| {{ | | {{Item|Forestry:thermionicTubes#7}} | ||
| | | | ||
| Infernal | | Infernal | ||
|- | |- | ||
| {{ | | {{Item|Forestry:thermionicTubes#8}} | ||
| | | | ||
| Rubber Trees | | Rubber Trees | ||
|- | |- | ||
| {{ | | {{Item|Forestry:thermionicTubes#10}} | ||
| Mushroom | | Mushroom | ||
| Mushroom | | Mushroom | ||
|- | |- | ||
| {{ | | {{Item|Forestry:thermionicTubes#11}} | ||
| | | | ||
| Cocoa | | Cocoa | ||
|} | |} | ||
Latest revision as of 06:12, 16 August 2024
The farm is an automated way of farming various crops.
Size
The Farm's central structure can be built in 6 different sizes. While larger farms cost more to build, they will provide resources at a higher rate due to the increased crop plot area.
These diagrams and figures show the maximum configurable area, the farm can operate within a smaller area as well. The farmable area is defined by where crop plot base blocks are placed.
| Layout Diagram | Center Size | Max Extents | Farmable Area | Farm Block Count | Total Farm Block Ingredients |
|---|---|---|---|---|---|
 |
3 x 3 (x 4) | 17 x 17 | 168 (2x64 + 40) | 36 | x72 (1x64 + 8)
x72 (1x64 + 8) (any wood type) x36 (see Central Mechanism) |
 |
4 x 3 (x 4) | 21 x 22 | 270 (4x64 + 14) | 48 | x96 (1x64 + 32)
x96 (1x64 + 32) (any wood type) x48 (see Central Mechanism) |
 |
4 x 4 (x 4) | 22 x 22 | 288 (4x64 + 32) | 64 | x128 (2x64)
x64 (see Central Mechanism) |

|
5 x 3 (x 4) | 25 x 27 | 396 (6x64 + 12) | 60 | x120 (1x64 + 56)
x120 (1x64 + 56) (any wood type) x60 (see Central Mechanism) |

|
5 x 4 (x 4) | 26 x 27 | 418 (6x64 + 34) | 80 (1x64 + 16) | x160 (2x64 + 32)
x160 (2x64 + 32) (any wood type) x80 (1x64 + 16) (see Central Mechanism) |

|
5 x 5 (x 4) | 27 x 27 | 440 (6x64 + 56) | 100 (1x64 + 36) | x200 (3x64 + 8)
x200 (3x64 + 8) (any wood type) x100 (1x64 + 36) (see Central Mechanism) |
Central Mechanism
The farm components can be made of the following materials (note that regular Sandstone is not an option):
Chiseled Sandstone |
Smooth Sandstone |
Bricks |
Stone Bricks |
Mossy Stone Bricks |
Cracked Stone Bricks |
Chiseled Stone Bricks |
Nether Brick |
Block of Quartz |
Chiseled Quartz Block |
Pillar Quartz Block |
For the central mechanism to be valid, the following criteria must be met:
- Must be 4 blocks tall, regardless of other dimensions
- Must be filled with Farm Blocks (not hollow)
- Must have at least 1 Farm Gearbox integrated into the structure
These aspects are customizable:
- Functional blocks (listed below) may be placed anywhere within the structure that is accessible from the outside, except in the second layer from the top (indicated by a thick gray band when fully assembled)
- Farm Blocks may be built from any mix of the above-listed materials
- More than 1 of the same type of functional block may be used (e.g. 2 Farm Hatches, one for input and one for output)
Note: The recipes below all show blocks made from Stone Bricks, however any of the above listed materials may be used.
Farm Block
The Farm Block is the basic building block of the central mechanism. It cannot be connected to using pipes, the other functional blocks must be integrated into the structure to allow for connections.
Farm Gearbox
The Farm Gearbox provides a connection for RF power using any RF transport mechanism. Power must be supplied for the farm to operate.
At least 1 Farm Gearbox is required for the structure to be valid.
Farm Hatch
The Farm Hatch provides a connection for item input/output using any item transport mechanism.
Farm Valve
The Farm Valve provides a connection for water input using any fluid transport mechanism.
Farm Control
The Farm Control accepts redstone signals. While an active redstone signal is received, the farm will stop operating.
Crop Plot Base


To define the area in which the farm operates, a base layer composed of any of the following blocks needs to be manually placed:
Sandstone |
Chiseled Sandstone |
Smooth Sandstone |
Bricks |
Stone Bricks |
Mossy Stone Bricks |
Cracked Stone Bricks |
Chiseled Stone Bricks |
Nether Brick |
Block of Quartz |
Chiseled Quartz Block |
Pillar Quartz Block |
The farm will place farmland on top of the base layer automatically in many configurations (see Configuration below). The farmable area is divided into 4 sections, as indicated by the coloured regions in the layout diagrams in the Size section. Each of the 4 sections is independent, and may be built at a different elevation if desired. The valid elevations are such that the farmland on top of the base layer will be anywhere between 1 block below, to 1 block above the central mechanism's vertical extents. It is not necessary for the crop plot base area to make full use of the maximum possible farmable area, however cutouts in the base area will cause any region behind the cutout to be ignored.
Configuration
By default, the farm will be configured in Managed Arboretum mode on all 4 sides. If this is the configuration you want, then you don't need to do any further configuration.
If you'd like to change the configuration, you will need to use a Soldering Iron and a Circuit Board.
The type of circuit board will determine how many sides can be configured:
| Item | Configurable Sides |
|---|---|
| Basic Circuit Board | 1 side |
| Enhanced Circuit Board | 2 sides |
| Refined Circuit Board | 3 sides |
| Intricate Circuit Board | 4 sides |
To configure the circuit board, 1 Electron Tube is required for each side. The type of tube will determine what will be farmed on each side.
| Item | Managed Farm | Manual Farm |
|---|---|---|
| Copper Electron Tube | Trees | Fruit Trees |
| Tin Electron Tube | Peat | Peat |
| Bronze Electron Tube | Crops | Crops |
| Iron Electron Tube | Vegetables | Vegetables |
| Golden Electron Tube | Cactus | |
| Diamantine Electron Tube | Sugar Cane | |
| Obsidian Electron Tube | Gourd | |
| Blazing Electron Tube | Infernal | |
| Rubberised Electron Tube | Rubber Trees | |
| Apatine Electron Tube | Mushroom | Mushroom |
| Lapis Electron Tube | Cocoa |